OBS Studio
With the freely usable OBS Studio you can produce screencasts or stream presentations in real time. Learn how you can use the different functions to bring recordings to life.
In a nutshell: What is OBS Studio?
FACTS
Link: https://obsproject.com/de/download
Licence: Open Source
TECHNICAL REQUIREMENTS
– The Windows version of OBS Studio supports Windows 8, 8.1 and 10.
– The macOS version of OBS Studio supports macOS 10.13 and newer.
– The Linux version is officially available for Ubuntu 14.04 and newer. FFmpeg is required.
The free and open-source app OBS Studio (formerly Open Broadcaster Software) lets you produce screencasts or stream presentations on video platforms such as YouTube in real time. Select the features you need for your screencast. Use different scene transitions, set hotkeys for various actions, or use the intuitive audio mixer.
For example, you can use screencasts in your teaching to:
- demonstrate laboratory instructions
- illustrate programs with a video tutorial
- annotate presentations and make them available online
- demonstrate tasks with commentary
- perform annotated video and image analysis
In OBS Studio you record the individual steps of a procedure by means of video capturing, while simultaneously explaining them by audio capturing. All you need is a microphone and the recording software.
Data Protection & Accessibility
Unfortunately, OBS Studio’s data protection is not very clear. For that reason, do not share any personal data via the service!
Range of Features
- Capture screen & webcam
- Record and embed music & sound
- Add transitions & effects
Uses
Step by Step
Useful Tip
The University of Hamburg provides introductory tutorials on OBS and its possible uses.
Download OBS Studio to your device and double-click to install the program. The wizard, or setup assistant, will guide you through the steps. Once the installation is complete, you can immediately start using OBS Studio.
The Auto-Configuration Wizard helps you to define the optimal settings at the beginning. Afterwards you can start the wizard from the Tools tab. From there, first select Optimize for recording, streaming is secondary.
Define where the recording is to be stored in the settings. Select Output and verify the recording path. Choose mp4 as the format for your recording.

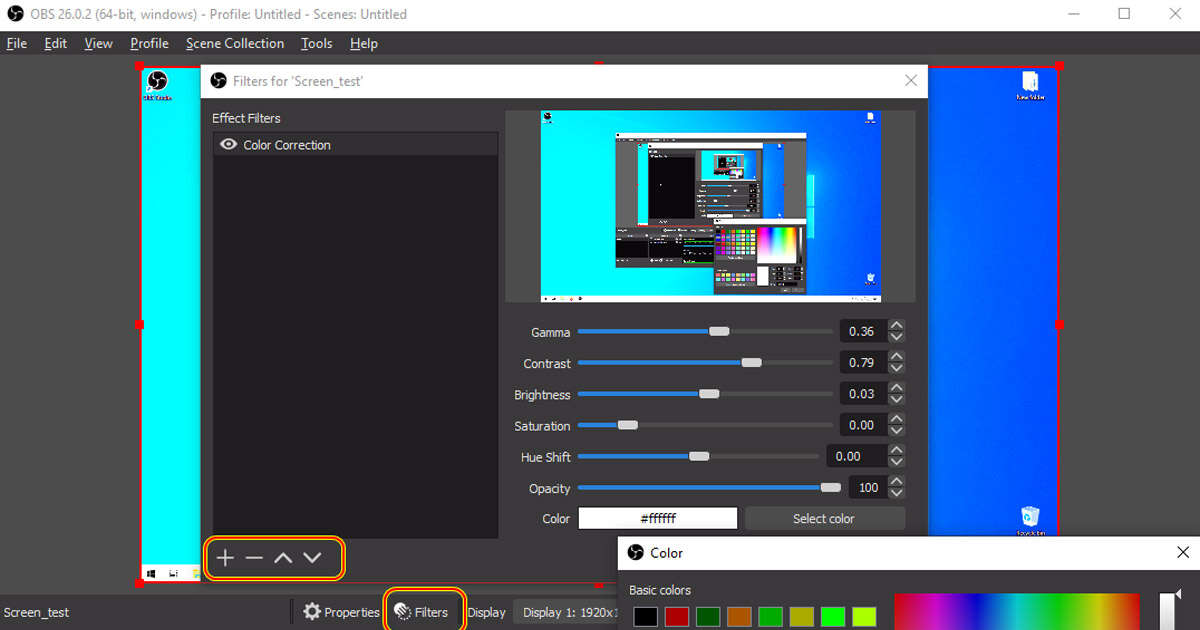
1. Create sources
Your scenes consist of one or more sources. These are where you define which devices or windows are to be recorded. Click on the plus symbols at the bottom of the window to add as many scenes and sources as you like. Later you can switch back and forth between these in Studio Mode.
2. Provide scenes with sources
Think about meaningful scenes for the recording and populate them with sources. For example, the source for your first scene (greeting) could be your webcam, and the source for the second scene (PowerPoint presentation) could be your desktop window. The sources can be combined and superimposed as desired. You adjust the properties of a previously created source by hitting the cogwheel.
3. Recording
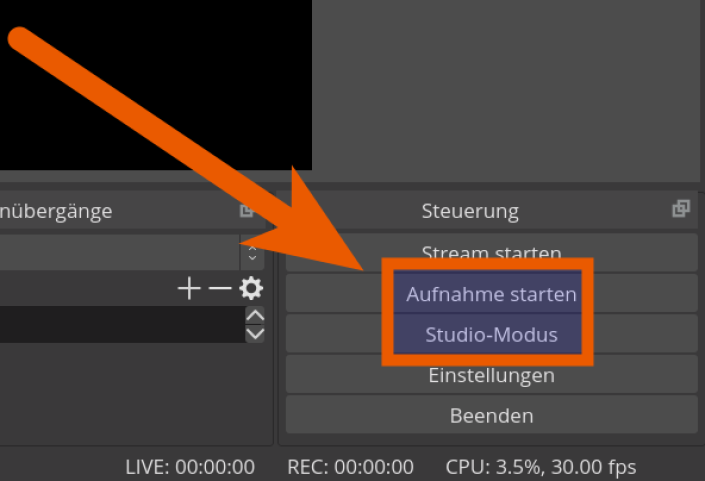
Activate Studio Mode from the Controls panel at the bottom right and start recording. In Studio Mode, you always see the currently active scene on the right and the inactive edit scene on the left. Use the Transition button to swap the left and right, making the scene you were editing the active scene.
4. Stopping
Stop Recording ends your recording. It can then be found in the previously specified recording path. OBS Studio does not have post-production capabilities, but other programs, such as Camtasia, are available for this purpose.
Live streaming with OBS Studio and YouTube
With OBS Studio you can stream your event live on YouTube in a non-public channel. The advantage: YouTube is widely used and easy to access on different devices. The disadvantage: it has unresolved privacy issues. You use YouTube at your own risk.
Walk-through:
1. Create your own YouTube channel
A prerequisite for live streaming on YouTube is having your own channel, for which you need a verified Google account. When you create a new account, verification takes place via a telephone number. Approval can take up to 24 hours.
Once your account is verified and you have created your YouTube channel, you need to activate live streaming in your channel.

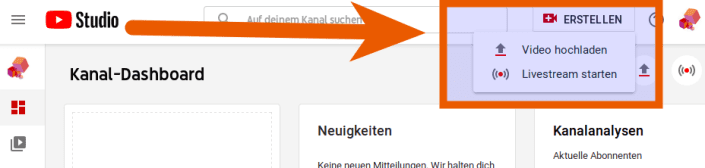
Now you can start streaming live by clicking on the Create button in YouTube Studio.
2. Set up a live stream
Enter a title in the settings screen for the live stream and choose the settings you need. Visibility, for example, is important. In order for students to be able to see your live stream—live or delayed—set the visibility to public, or to at least unlisted. You can send the link to the stream by email or publish it in a suitable place in the learning management system. In Stream Settings, copy the Stream key for OBS.
Open OBS Studio and set up the scenes and sources as described in Step 3: make a screen recording. Then, in Settings – Stream, select YouTube as the service platform and paste in the stream key you copied.

3. Starting and stopping a live stream
Click Start Streaming in OBS Studio to connect to YouTube. You will be able to see a first preview directly on YouTube before you make your contribution visible to your audience by clicking on the Go live button. To stop, select End Stream at the bottom.
Any questions?
Feel free to contact us by mail to lehrpfade@th-koeln.de!