Miro
On the virtual whiteboard Miro, you can work interactively and synchronously with your students, regardless of location. We will show you how to use the tool to combine media, collect ideas together and develop concepts.
In a nutshell: What is Miro?
FACTS
Link: https://miro.com/
Login: https://miro.com/login/
Lizence: no licence at TH Köln
TECHNICAL REQUIREMENTS
– Internet connection
– Laptop, smartphone, or tablet
Miro is an endless digital whiteboard on which you can work together with your students interactively, regardless of location. Any number of participants can work on the same task, collect and visualize ideas, develop concepts, and organize tasks. Various templates (sticky notes, mind maps, project plans … ), including those from the Miroverse collection, facilitate the creation of boards.
Data Protection & Accessibility
Unfortunately, privacy is not fully guaranteed with Miro— read about its data protection here (German). For that reason, do not share any personal data via the service! Information on accessibility and Miro can be found here.
Range of Features
- Visualize brainstorming, planning, strategies, and periodic tasks independently or with the help of templates
- carry out various group activities in small teams
- Add images and files
- Create presentations
- Conduct video conferences
- Integrate with other apps like Jira, Trello, Zoom, Slack
Uses
Step by Step
Miro can be launched as a desktop app or in a browser window. Register on the Miro website with your TH Köln email address, your name, and a password of your choice. If necessary, download the app for your particular device (smartphone, tablet) from the website.
Once you have registered, you can start using Miro immediately. No further set-up is required. You can open Miro either in a browser or from the app.
After signing in you will find yourself on the Miro home page. Click on New Board to create a new board, or select Show all templates to find a template that suits your project.

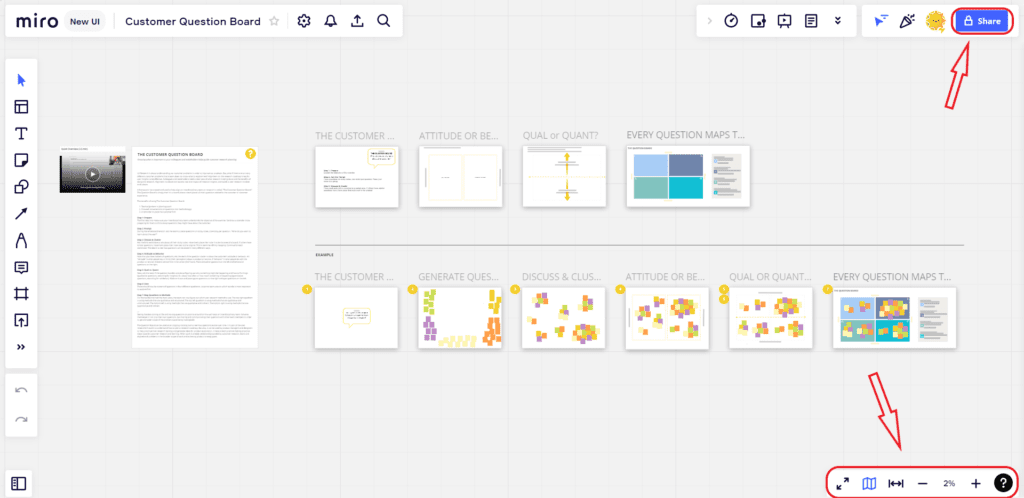
Once you have created a board, you can share it with other people. To do this, click on the Share button in the top right of the menu bar. Enter the email addresses of the people you want to share the board with and decide what permissions they should have. You can choose between can edit, can comment, or can view.
A board can quickly become so big that it becomes hard to view. Don’t worry! To see where the different content is placed on the board, go to the Map in the bottom right corner and click the percentage (or scroll your mouse wheel) to be zoomed in/out to the recommended optimal view. If you keep the right mouse button pressed, you can move back and forth on the board.
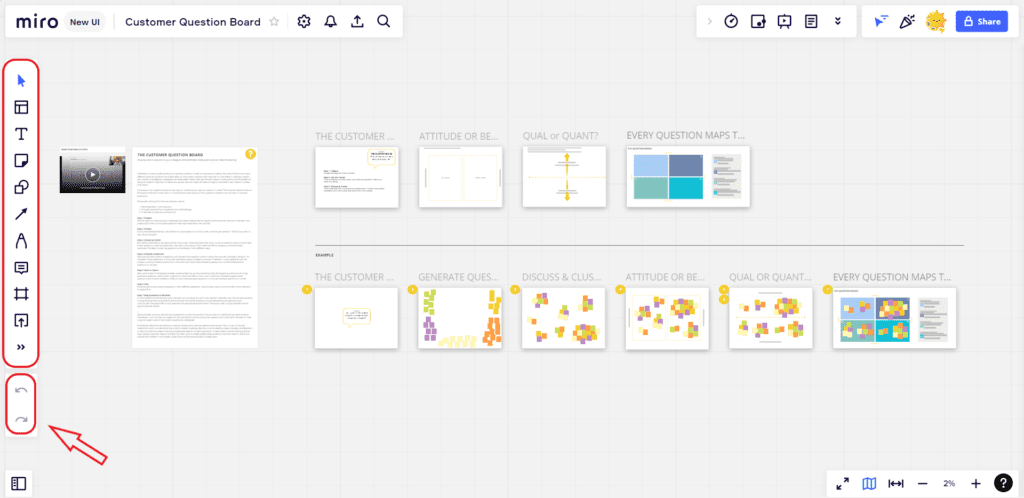
Now you can create and insert various content. The menu bar on the left, on which the individual tools are listed one below the other, is particularly relevant for this: Select sticky notes, shapes, text fields, arrows, lines, tables, emojis and much more to design your board. If you accidentally delete or move something, you can undo it by clicking on the top of the two arrows located under the tools. To restore it, click the bottom arrow.
Useful Tips
Make sure your facilitation is good! A board can quickly become large and unwieldy, so it needs a person who can control and moderate the workshop.
Structure the board! If you are working collaboratively on a board, you should lock objects if necessary so that they are not accidentally moved or deleted. To do this, select the item you want to lock and then click on the lock symbol.
Any questions?
Feel free to contact us by mail to lehrpfade@th-koeln.de!